Google Colab 部署 🚀
免费,便捷,省心,适合设备性能有限的用户,强烈推荐~
想尝试本地部署?跳到 《本地安装》 章节
什么是 Colab?
Google Colab 借助 Colaboratory(简称 Colab),您可在浏览器中编写和执行 Python 代码,并且:
- 无需任何配置
- 免费使用 GPU
- 轻松共享
无论您是一名学生、数据科学家还是 AI 研究员,Colab 都能够帮助您更轻松地完成工作。您可以观看 Introduction to Colab(Colab 简介)或 Colab Features You May Have Missed(您可能错过的 Colab 功能)了解详情,或在下面开始使用!
类似的平台,还有:
Kaggle 是一个数据科学和机器学习的在线平台,它为数据科学家和机器学习工程师提供了一个可以分享代码、数据集和解决方案的社区.
| 提供商 | 内存 CPU | 内存 | GPU | 显存 | 额度 |
|---|---|---|---|---|---|
| Google Colab | Intel Xeon(R) CPU @ 2.20GHz | 12G | T4 | 15G | 日1-3小时 |
| Kaggle | Intel Xeon(R) CPU @ 2.20GHz | 30G | T4*2 | 15G*2 | 周30小时 |
注意
Google Colab 需要科学上网,Kaggle 无需科学上网
安装步骤
1. 克隆下载
bash
# 默认目录
%cd /content

# 删除文件
%rm -rf /content/CreatorBox/

# 克隆下载
!git clone https://github.com/xiesx123/CreatorBox.git

# 安装依赖
%cd /content/CreatorBox/
!python cli.py install \
	-f src/support/third_party/elevenlabs/requirements.txt \
	-f src/support/third_party/cosyvoice/requirements.txt \
	-f src/support/third_party/f5_tts/requirements.txt \
	-f requirements.txt

# 安装软件
!pip install pyngrok
!curl -sSL https://ngrok-agent.s3.amazonaws.com/ngrok.asc \
	| sudo tee /etc/apt/trusted.gpg.d/ngrok.asc >/dev/null \
	&& echo "deb https://ngrok-agent.s3.amazonaws.com buster main" \
	| sudo tee /etc/apt/sources.list.d/ngrok.list \
	&& sudo apt update \
	&& sudo apt install ngrok \
	&& sudo apt install rubberband-cli
2. 环境变量
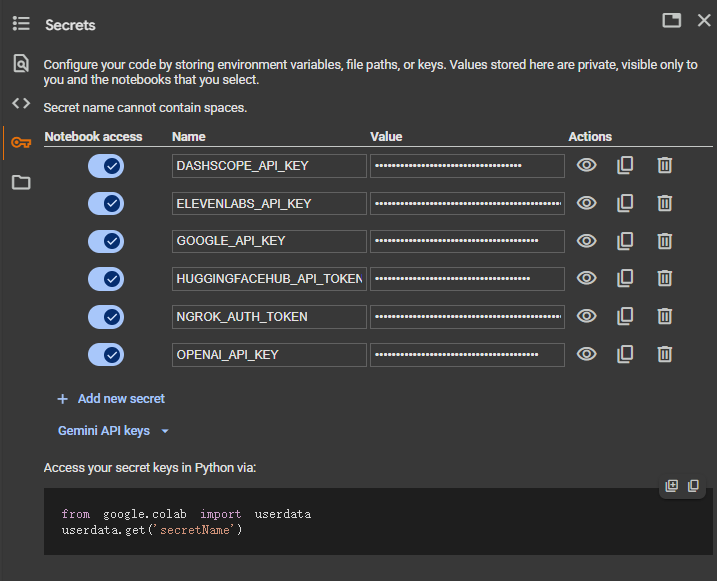
提示
环境变量配置见 《准备工作》 章节
3. 启动运行
程序在当前终端窗口运行,并且终端会占用直到程序退出
bash
# 工作目录
%cd /content/CreatorBox

# 启动应用无透传
# !python cli.py start -p 80

# 启动应用并透传 `-nh 是你申请的 Host 地址`
!python cli.py start -p 80 -nh 'toucan-real-informally.ngrok-free.app' --ngrok
如图所示,成功打印说明启动成功
log
_____                _            ______
/  __ \              | |           | ___ \
| /  \/_ __ ___  __ _| |_ ___  _ __| |_/ / _____  __
| |   | '__/ _ \/ _` | __/ _ \| '__| ___ \/ _ \ \/ /
| \__/\ | |  __/ (_| | || (_) | |  | |_/ / (_) >  <
\____/_|  \___|\__,_|\__\___/|_|  \____/ \___/_/\_\   v1.0.16.c393f6c

2025-06-03 19:38:19.383 | INFO 1184 main.py:99 -  Build on master at 2025-06-03 10:05:20 started run Debug successfully (5.64 seconds)
2025-06-03 19:38:19.385 | INFO 1184 task.py:27 -  Startup scheduler 2 job completed.
2025-06-03 19:38:19.385 | INFO 1184 main.py:109 - Startup gradio 0 app completed.
2025-06-03 19:38:19.386 | INFO 1184 main.py:110 - http://172.18.0.1:8000
提示
- Notebook 每次只能执行1个单元格;
- 默认输出目录:google colab
/content,kaggle/kaggle/working
内网透传
log
PyngrokNgrokError:
The ngrok process errored on start: authentication failed:
Your account is limited to 1 simultaneous ngrok agent sessions.
You can run multiple simultaneous tunnels from a single agent session by defining the tunnels in your agent configuration file and starting them with the command `ngrok start --all`.
Read more about the agent configuration file: https://ngrok.com/docs/secure-tunnels/ngrok-agent/reference/config
You can view your current agent sessions in the dashboard:
https://dashboard.ngrok.com/agents ERR_NGROK_108.